Wine display "Leaning plank
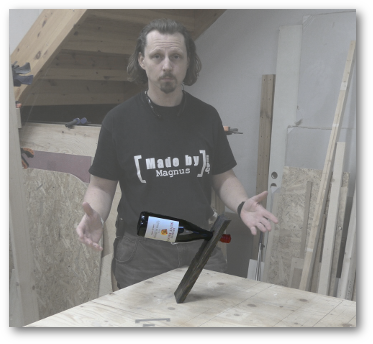
This is my version of a wine display that I've seen many years ago, that utilized the concept of balancing a board with the help of a wine bottle. I thought it looked cool and can also act as a conversation piece. It's easy and quick to make and is a perfect gift together with a bottle of wine and will last longer than flowers.
This wine display is an easy diy project and is possible to vary in infinity. I chose to make a rustic and simple looking version from fir, but you can just as easily make it look more like a fine art piece. To accomplish that you could glue three strips of contrasting wood and maybe add some curves to the sides The only thing that is really important to make this work, is the angle on the bottom bevel and the placement of the hole for the bottle.
Download the free plans here!
How I made it:

I started with a left over panel board of fir that measured 45 by 95 mm, wich corresponds to a 1" by 4". The pieces were cut to a rough length at the mitre saw and then were taken to the table saw to make the bevel on the bottom.
I could also have used my mitre saw to make the bevel cut but I first had to make some test cuts to get the angle right. This testing was easier for me to do on the table saw and it resulted in an angle of 30º.
The other critical thing that has to be correct is the placement of the hole for the wine bottle. I found the center of the board along the length of it and then measured 222 mm up from the short end of the bevel. In imperial this is about 8 3/4" or more accurately 8.74" (222/25.4). This was the placement of the hole of the wine bottle and I then drilled it out on my drillpress with a 35 mm forstner bit, that corresponds to 1 3/8".
If you are making a more fancy looking piece, consider to drill the hole at a 30º angle to match the bottom and top bevel.


I rounded the edges of the hole with a small roundover bit on my trim router before I started to make the surface rough. This was made with a steel wire brush in my drill and I went over all surfaces to get the right amount of texture. I was a bit carful on the bottom side to not remove too much material, after all it's the base that gives the stability.
Then it was just to finish it up with some 80 grit sandpaper to get rid of all loose splinters.
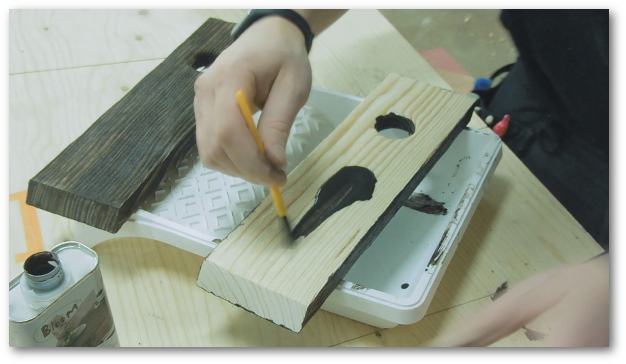
To get the color right and add to that vintage look I used a dark oak stain. I applied a liberal amount and then quickly wiped off the excess with a paper towel.
After the stain was completely dry I sanded lightly with a 240 grit sandpaper and then removed all the dust with compressed air.
As a finish I used a water based matt finish clear lacker, which I added in two coates with a light sanding in between.


And that's pretty much all ther's to it!
An easy to make present that also is easy to batch out if you want to sell them at craft shows.
